第一章:存放网站程序和添加入IIS
1.1:将网站解压到自己所在测试目录下,如下图:

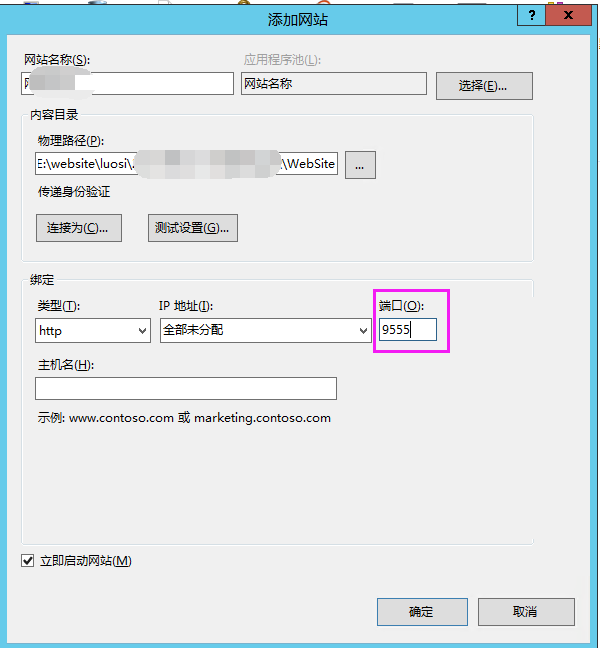
1.2将网站添加入IIS,并设置相应端口号
第二章:设置应用池和添加权限
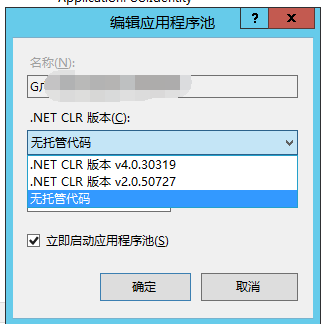
2.1设置应用此为无托管
步骤:应用程序池=>绑定的IIS站点名称应用池=>右键=>基本设置=>.NET CLR版本=>无托管代码
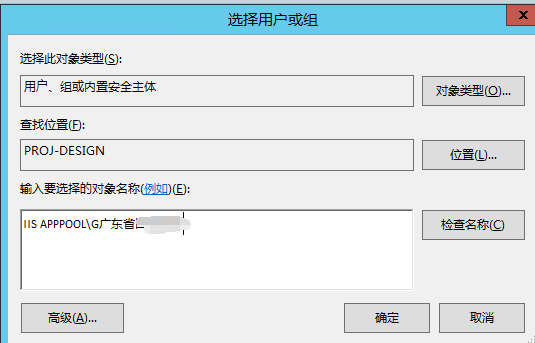
2.2设置当前IIS上网站目录的权限
右键=>编辑权限=>安全=>高级=>添加=>选择主体=>输入=>IIS APPPOOL\该站点名称(该站点应用池名称)=>确认=>给予相应的修改、删除、创建权限
权限选择:
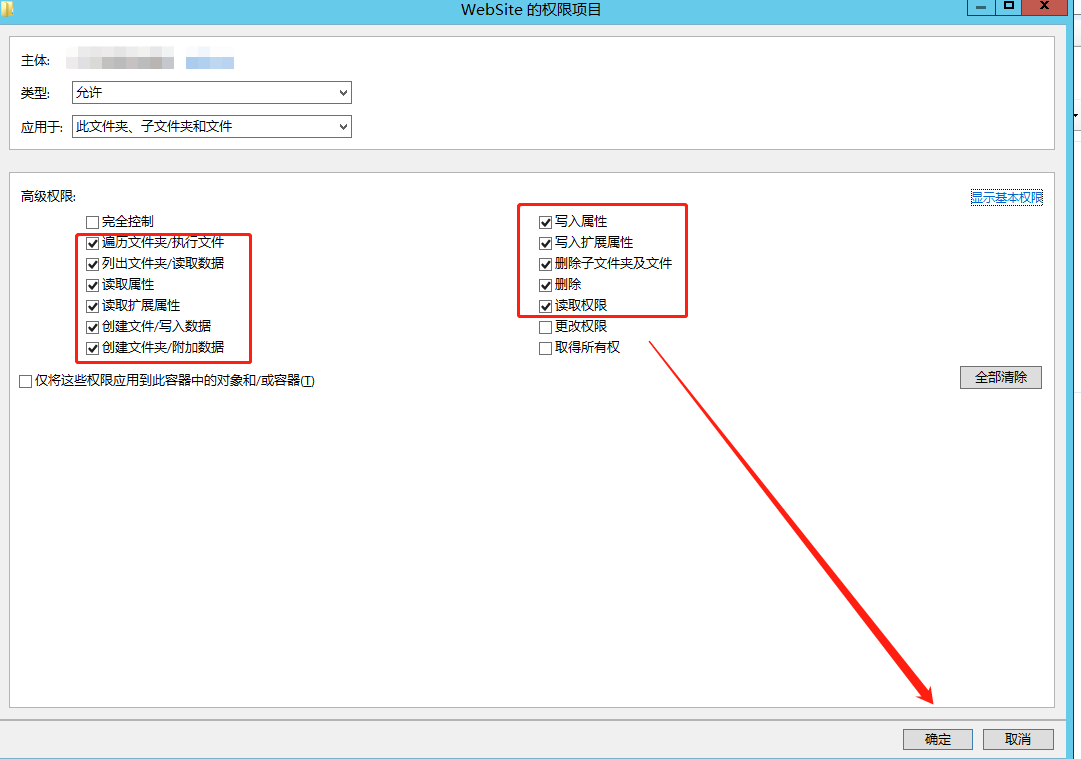
Tip: 此为宽松的权限设置,正常配置应该针对各目录进行设置!
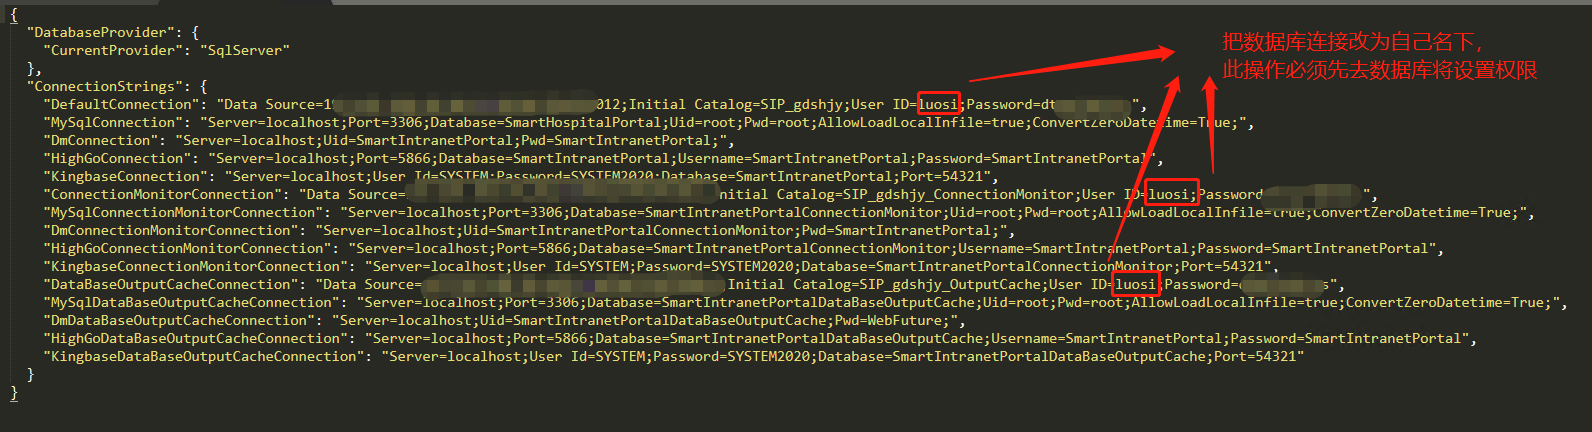
第三章:设置数据库链接
文件路径:根目录\Configuration\connectionstrings.json

各版本数据库信息存放位置:E:\website\ 中有各数据库服务器信息
第四章:设置网站其它配置
4.1 根目录\web.config 设置,必须设置不然无法启动
<?xml version="1.0" encoding="utf-8"?>
<configuration>
  <location path="." inheritInChildApplications="false">
    <system.webServer>
      <handlers>
        <clear />
        <add name="aspNetCore" path="*" verb="*" modules="AspNetCoreModuleV2" resourceType="Unspecified" />
      </handlers>
      <aspNetCore
processPath="dotnet"
arguments=".\PowerEasy.WebSite.SmartEduPortal.dll"
stdoutLogEnabled="false"
stdoutLogFile=".\logs\stdout"
startupTimeLimit="500"
hostingModel="InProcess" /> <!-- 追加 startupTimeLimit="500" 防止超时  -->
      <httpProtocol>
        <customHeaders>
          <remove name="X-Powered-By" />
        </customHeaders>
      </httpProtocol>
      <security>
        <requestFiltering removeServerHeader="true"><!-- 去掉  removeServerHeader="true"  -->
          <requestLimits maxAllowedContentLength="524288000">
            <headerLimits>
              <add header="Content-type" sizeLimit="100" />
            </headerLimits>
          </requestLimits>
          <verbs allowUnlisted="false">
            <add verb="GET" allowed="true" />
            <add verb="POST" allowed="true" />
            <add verb="HEAD" allowed="true" />
          </verbs>
        </requestFiltering>
      </security>
    </system.webServer>
  </location>
</configuration>
1、<aspNetCore 里面追加 startupTimeLimit="500" 第一次启动等待最大时间
2、<requestFiltering removeServerHeader="true"> 代码把 removeServerHeader="true"
4.2 访问网站,页面只会空白时请等待安装完成!
耐心等待,安装完成会自动显示网站首页
4.3 替换授权文件
文件位置:E:\website\测试站-webfuture10.0系列授权文件
请对应版本替换
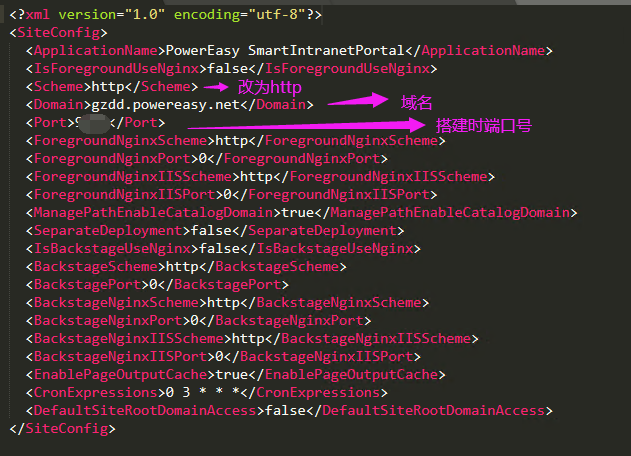
4.4 更改站点信息
更改协议、域名、端口号
文件路径:根目录\Config\site.config
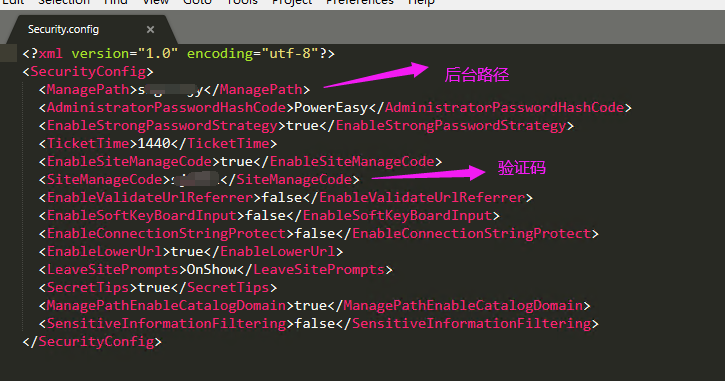
更改后台路径和验证码
文件路径:根目录\Config\Security.config
第五章:更改数据库链接账号密码
文件路径:根目录\Configuration\connectionstrings.json